30天鐵人賽介紹 AWS 雲端世界 - 20: Lambda 搭配 API Gateway,實現 Serverless 架構可以被外部呼叫觸發
What is API Gateway
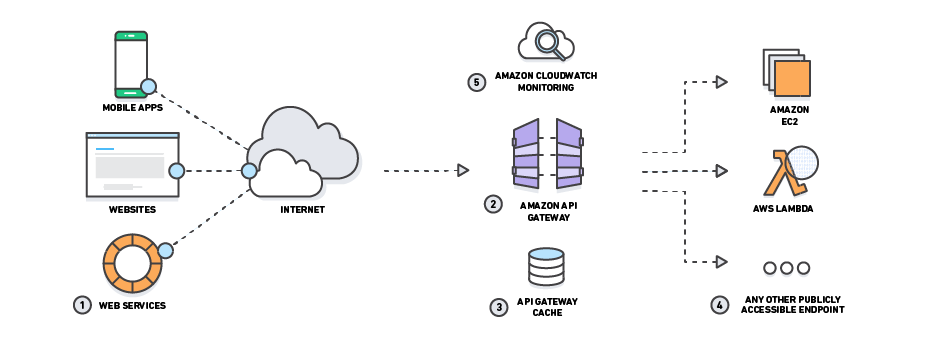
API Gateway 是一種全託管的服務,可讓開發人員輕鬆地建立、發佈、維護、監控和保護任何規模的API。此服務主要是提供一個網址讓外部可以直接呼叫到 AWS 原本不對外開放的服務街口(如 Lambda 的事件驅動架構就算是一個代表性)。
計費的部份就有三個部份:呼叫次數、流量大小與附加服務(如提供快取功能等),
在免付費的方案內包含了最多 12 個月每月 100 萬次 API 呼叫. 詳細計價方式請參考
在昨天的分享裡面介紹了 Lambda 與 無伺服器架構如何放置程式上去運行,但觸發的方式都是被動地等待事件被呼叫才進行,如果想要以傳統 API 方式進行呼叫,則必須搭配 API Gateway ,運用其 API Event Trigger 的方式去執行對應的動作。
Hands on Lab
這邊我們將延續昨天的 Lab ,提供一個可以處理 HTTP 的 API 接口給 Lambda 並請他執行 Hello 這項動作。
這邊可以加入 Amazon.Lambda.APIGatewayEvents 幫我們將 Lambda 服務公開成 API 給外部呼叫:
dotnet add package Amazon.Lambda.APIGatewayEvents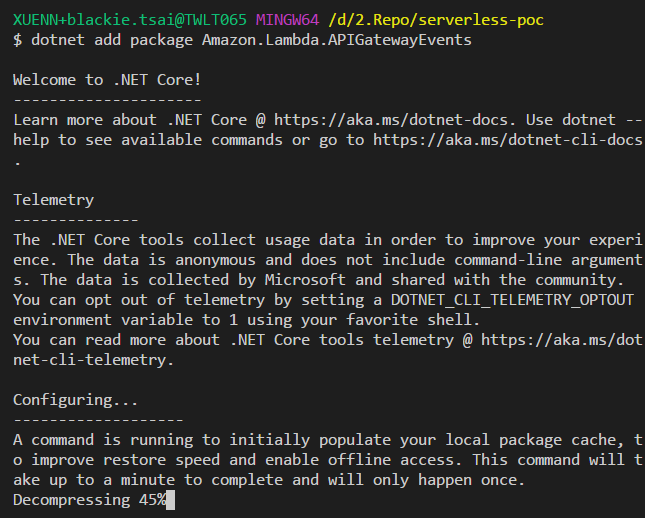
我們也可以手動加入專案後在透過還原指令將套件下載回來:
dotnet restore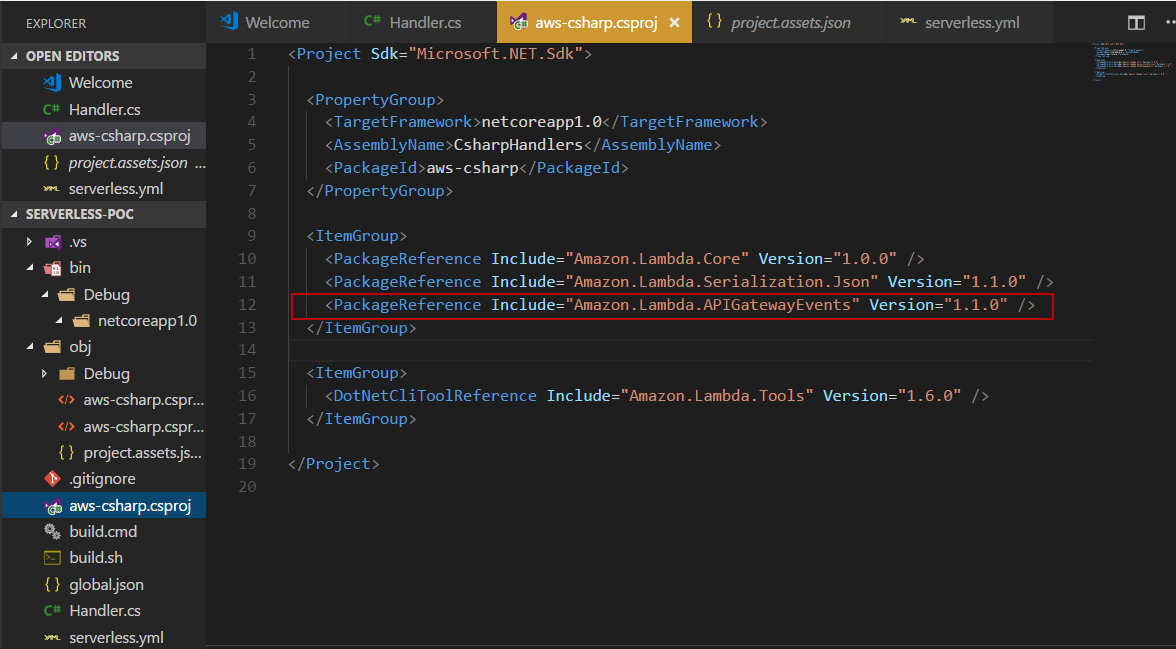
接著我們將修改一下 handler.cs 為以下的內容:
using System;
using System.Collections.Generic;
using System.Net;
using Amazon.Lambda.APIGatewayEvents;
using Amazon.Lambda.Core;

[assembly:LambdaSerializer(typeof(Amazon.Lambda.Serialization.Json.JsonSerializer))]

namespace AwsDotnetCsharp
{
    public class Handler
    {
       public Response Hello(Request request, ILambdaContext context)
       {
            // Log entries show up in CloudWatch
            context.Logger.LogLine ("Example log entry\n");

            var response = new APIGatewayProxyResponse {
                StatusCode = (int) HttpStatusCode.OK,
                Body = "{ \"Message\": \"Go 2018 iT 邦幫忙鐵人賽\" }",
                Headers = new Dictionary<string, string> { { "Content-Type", "application/json" } }
            };

            return response;
       }
    }

    public class Response
    {
      public string Message {get; set;}
      public Request Request {get; set;}

      public Response(string message, Request request){
        Message = message;
        Request = request;
      }
    }

    public class Request
    {
      public string Key1 {get; set;}
      public string Key2 {get; set;}
      public string Key3 {get; set;}

      public Request(string key1, string key2, string key3){
        Key1 = key1;
        Key2 = key2;
        Key3 = key3;
      }
    }
}
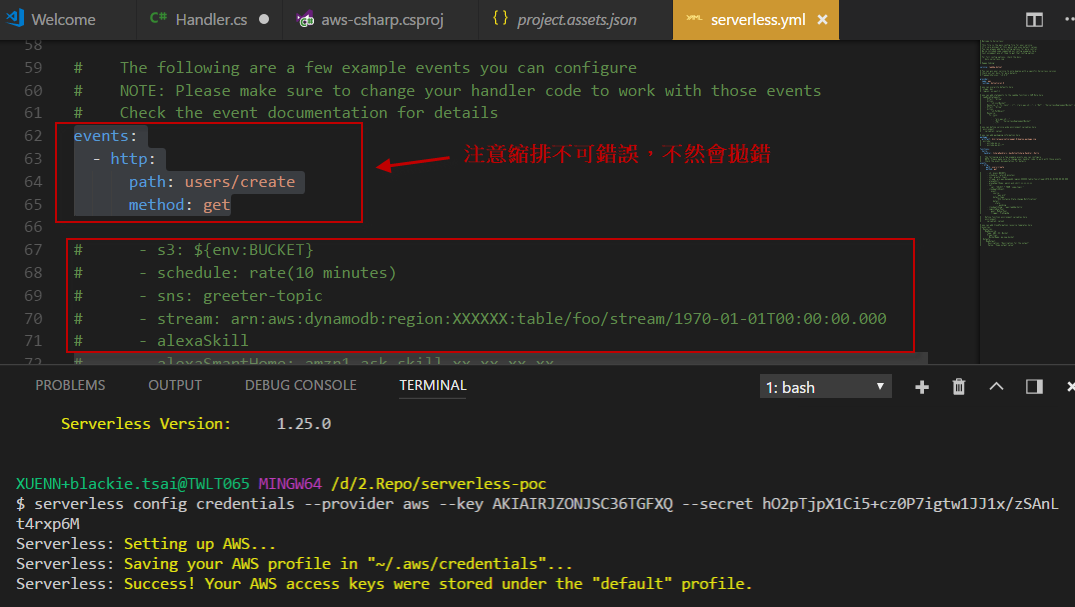
而因為我們因為要使用 API Gateway 則需要修改到 serverless.yaml 將服務啟用並設定指定的路徑:
serverless.yaml
# Welcome to Serverless!
#
# This file is the main config file for your service.
# It's very minimal at this point and uses default values.
# You can always add more config options for more control.
# We've included some commented out config examples here.
# Just uncomment any of them to get that config option.
#
# For full config options, check the docs:
#    docs.serverless.com
#
# Happy Coding!

service: lambda-dotnet

# You can pin your service to only deploy with a specific Serverless version
# Check out our docs for more details
# frameworkVersion: "=X.X.X"

provider:
  name: aws
  runtime: dotnetcore1.0

# you can overwrite defaults here
#  stage: dev
#  region: us-east-1

# you can add statements to the Lambda function's IAM Role here
#  iamRoleStatements:
#    - Effect: "Allow"
#      Action:
#        - "s3:ListBucket"
#      Resource: { "Fn::Join" : ["", ["arn:aws:s3:::", { "Ref" : "ServerlessDeploymentBucket" } ] ]  }
#    - Effect: "Allow"
#      Action:
#        - "s3:PutObject"
#      Resource:
#        Fn::Join:
#          - ""
#          - - "arn:aws:s3:::"
#            - "Ref" : "ServerlessDeploymentBucket"
#            - "/*"

# you can define service wide environment variables here
#  environment:
#    variable1: value1

# you can add packaging information here
package:
  artifact: bin/release/netcoreapp1.0/deploy-package.zip
#  exclude:
#    - exclude-me.js
#    - exclude-me-dir/**

functions:
  hello:
    handler: CsharpHandlers::AwsDotnetCsharp.Handler::Hello
    events:
      - http:
          path: users/create
          method: get
#    The following are a few example events you can configure
#    NOTE: Please make sure to change your handler code to work with those events
#    Check the event documentation for details
#    events:
#      - http:
#          path: users/create
#          method: get
#      - s3: ${env:BUCKET}
#      - schedule: rate(10 minutes)
#      - sns: greeter-topic
#      - stream: arn:aws:dynamodb:region:XXXXXX:table/foo/stream/1970-01-01T00:00:00.000
#      - alexaSkill
#      - alexaSmartHome: amzn1.ask.skill.xx-xx-xx-xx
#      - iot:
#          sql: "SELECT * FROM 'some_topic'"
#      - cloudwatchEvent:
#          event:
#            source:
#              - "aws.ec2"
#            detail-type:
#              - "EC2 Instance State-change Notification"
#            detail:
#              state:
#                - pending
#      - cloudwatchLog: '/aws/lambda/hello'
#      - cognitoUserPool:
#          pool: MyUserPool
#          trigger: PreSignUp

#    Define function environment variables here
#    environment:
#      variable2: value2

# you can add CloudFormation resource templates here
#resources:
#  Resources:
#    NewResource:
#      Type: AWS::S3::Bucket
#      Properties:
#        BucketName: my-new-bucket
#  Outputs:
#     NewOutput:
#       Description: "Description for the output"
#       Value: "Some output value"
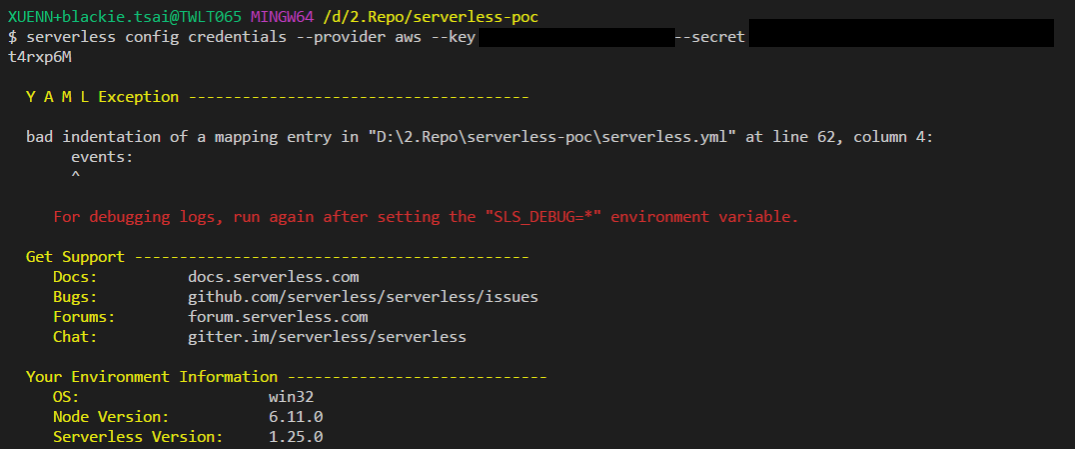
這邊如果設定的縮排不對會有錯誤或是部屬不如預期的情況,所以請仔細檢查:
而修改完後別忘記需要再次打包壓縮檔後才執行部屬指令:
dotnet lambda package --configuration release --framework netcoreapp1.0 --output-package bin/release/netcoreapp1.0/deploy-package.zip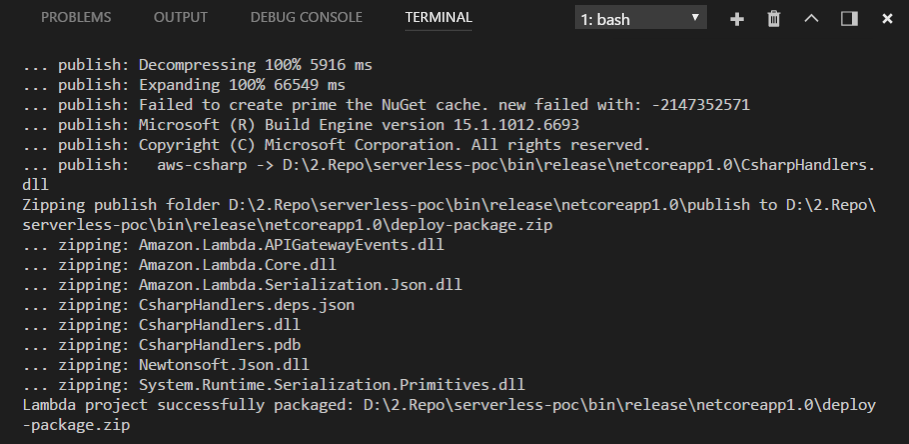
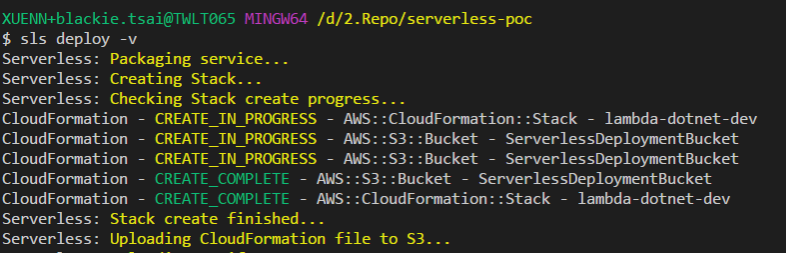
最後我們透過部屬指令即可成功部屬上去:
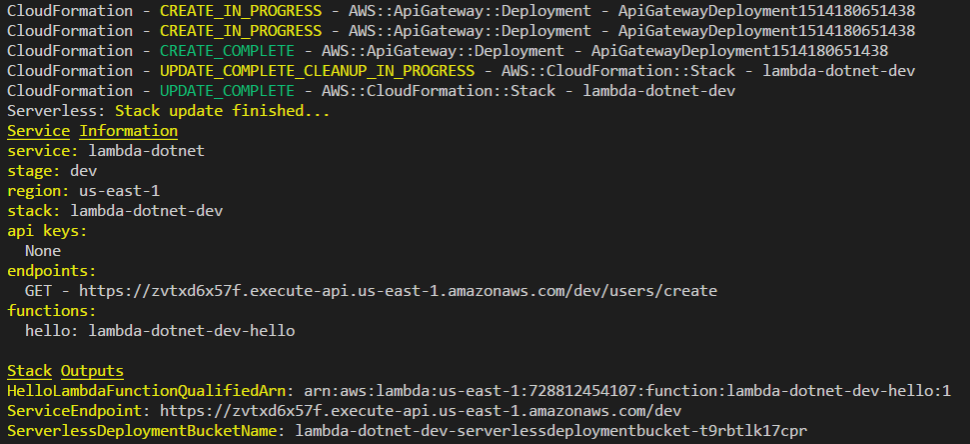
而現在我們就可以透過 url 來直接看到回應內容了:

而當我們登入 Lambda 後可以看到服務的架構已經從原先的:
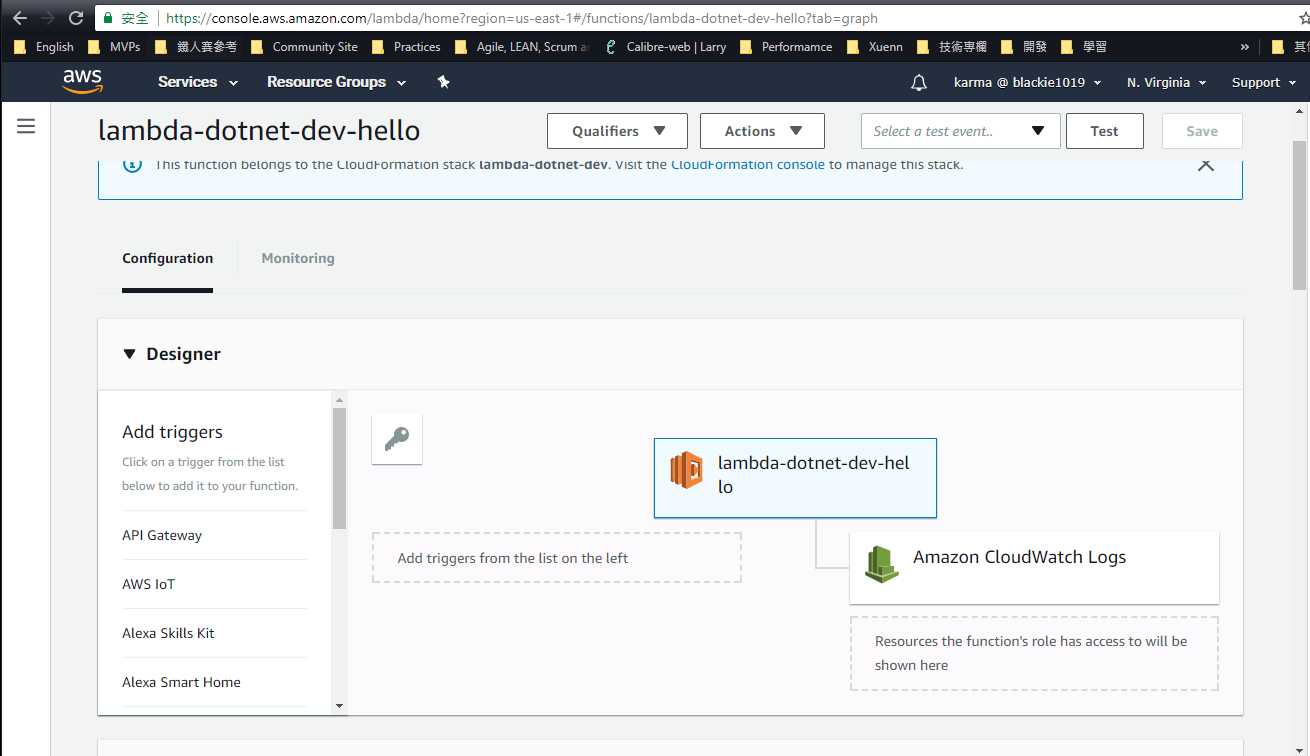
變成如下:

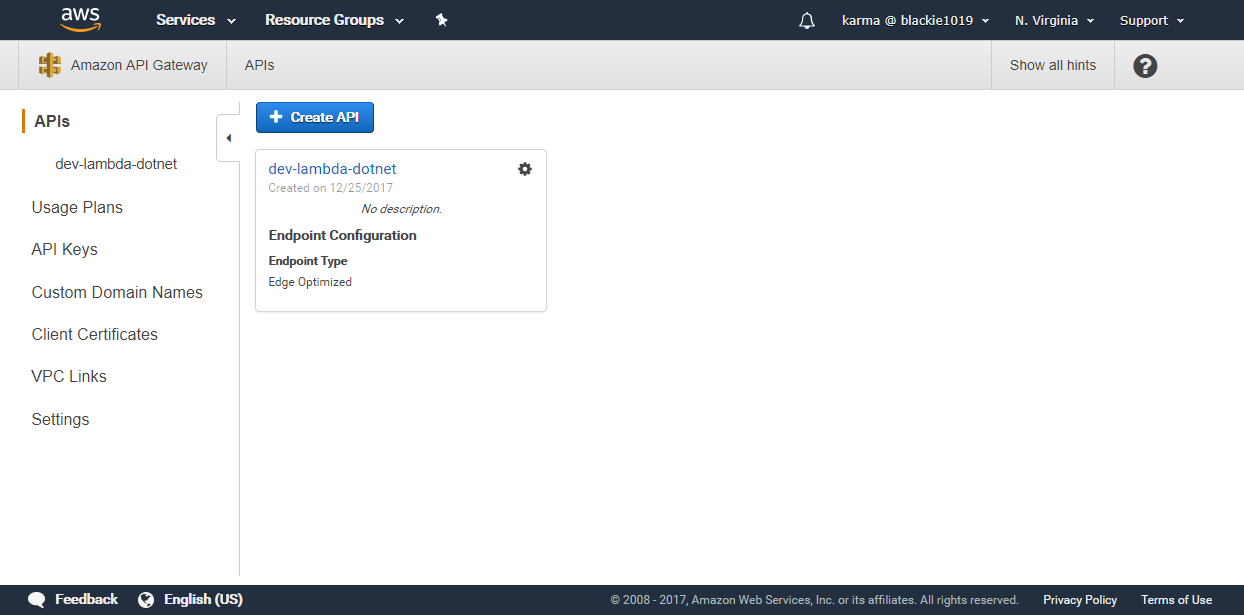
而從 API Gateway 也可以看到多了一個端點(endpoint):
References
- Amazon API Gateway
- Amazon API Gateway 常見問答集
- [Going serverless with .NET Core, AWS Lambda and the Serverless framework](serverless config credentials –provider aws –key AKIAIRJZONJSC36TGFXQ –secret hO2pTjpX1Ci5+cz0P7igtw1JJ1x/zSAnLt4rxp6M)